

Embassy Chocolate's Easter Special: Bonbon Recipe Collections
This Easter, we are redefining the seasonal palate by pairing the velvety, well-balanced sweetness of Embassy Zen 33% White Chocolate with a trio of...
4 min read
Chocolate is a favorite ingredient of choice to make cake decorations. Not only does it look shiny when prepared properly, it’s also perfectly edible, and as we all know, tastes really good! From abstract geometric shapes to delicate flower petals, the many properties of chocolate make it possible to shape, bend and mold into different forms.
Among other types of chocolate, white chocolate is probably the most fun type of chocolate to decorate with. Its yellowish-white color makes it possible for you to color into different shades and hues. But of course, you can’t go wrong with white chocolate’s natural color.
In this article, we’ll show you 5 beautiful cake decoration inspirations you can make out of white chocolate, as well as how to make them.

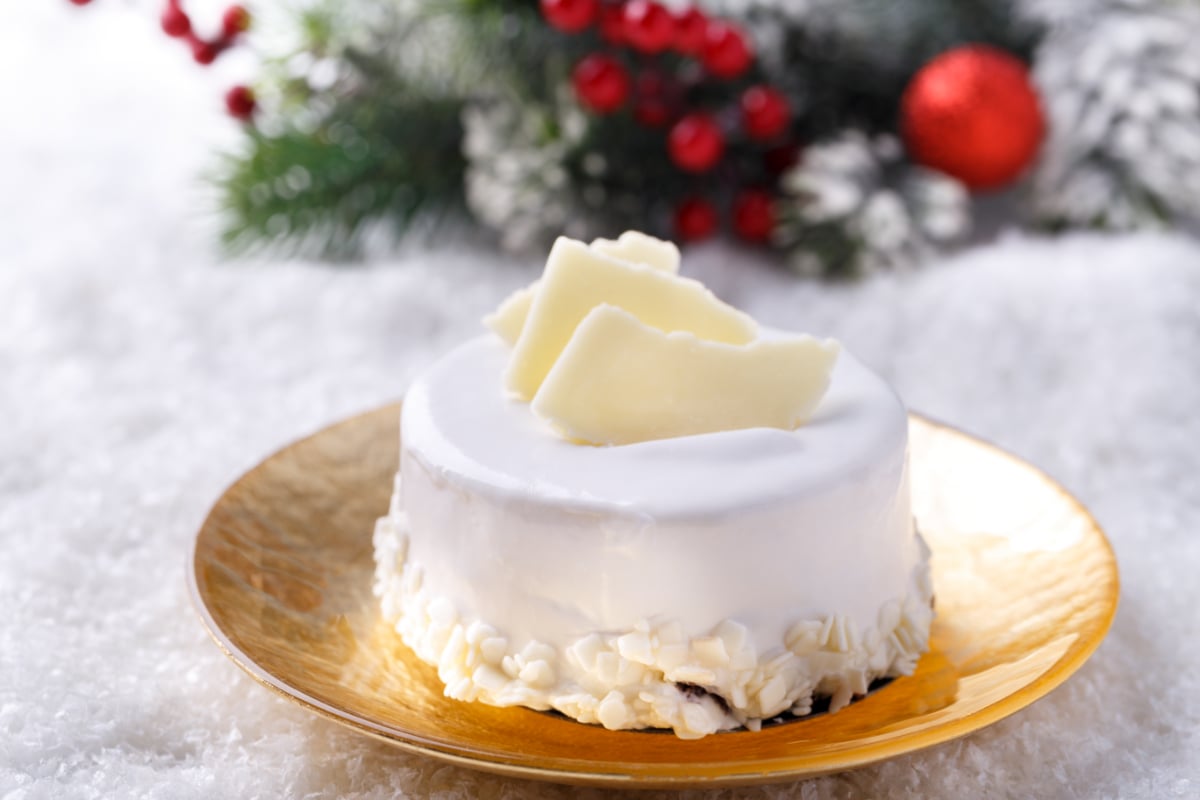
Chocolate shards are an incredibly simple decoration that you can add to your cakes. We love how its beauty lies in its asymmetrical shape. The random placement of the added sprinkles in the picture above makes it even more eye-catching!
To make chocolate shards, melt some white chocolate using the microwave or bain-marie method, then pour it on a baking paper or tray. Even it out until about 0.5 cm thick by shaking the baking paper or tray gently. While it is half-set, you can sprinkle it with whatever you like. Options include nuts, seeds, colored sprinkles, matcha powder or cocoa powder, cocoa nibs, dried fruits, etc.
Afterwards, let it set. When it has hardened, break into asymmetrical pieces and place them on top of your cake.
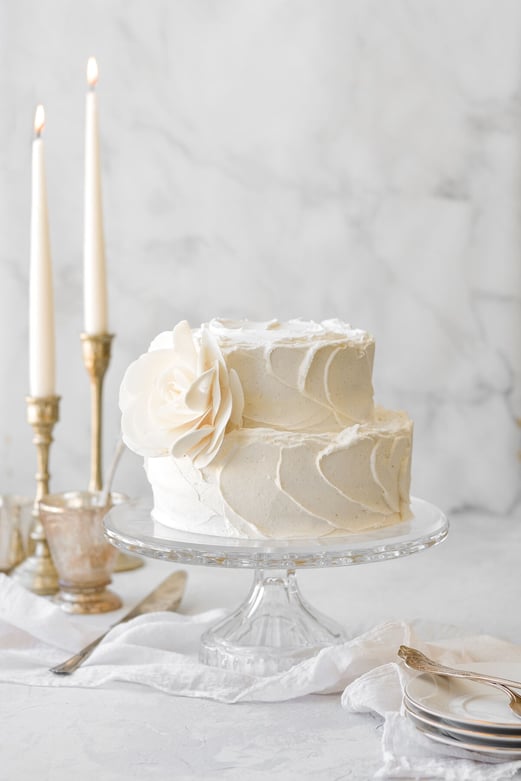
A big flower decoration is sure to turn heads to your cake. It might look complicated to make, but it is actually very simple and you don’t need any special tools.
To make this decoration, what you will need are:
To make the flower decoration, first, insert the melted and tempered chocolate into the piping bag. Pipe a round shape on baking paper, then cover it with another layer of baking paper and use your finger to shape the chocolate upwards, making it into a petal shape. Peel the baking paper off and let them set on top of the rolling pin to shape it. This creates a thin layer of flower petals that you can use for the outer layers of the flower.
For the inner petals, make progressively smaller dollops and repeat the process but instead of using your finger, spread them out using a spoon to make longer petals.
To assemble the flower, use a cookie cutter ring and place a dollop of melted chocolate in the middle. Firstly place the outer petals into the center of the ring. Once the first layer is done, add another dollop of melted chocolate and do the second layer using the inner petals.
When assembling, be sure to not touch the petals for too long as they will melt the chocolate. If it melts, put it in the fridge until it hardens again.
Read more: Getting to Know Pound Cake
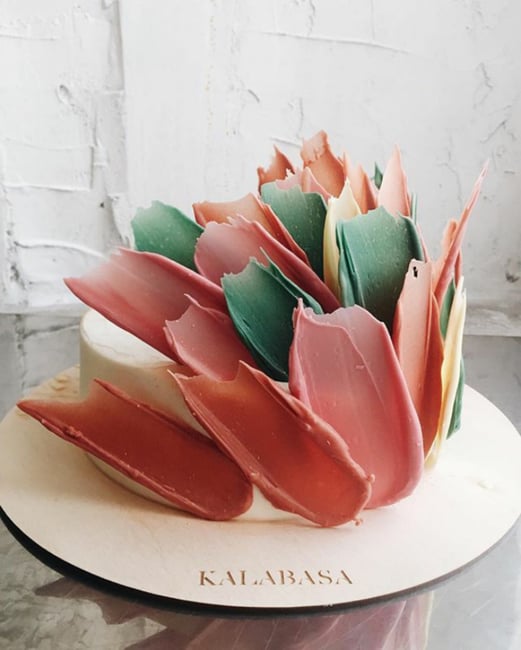
The brush stroke decoration recently went popular due to the beautiful creations by Kalabasa, a bakery from Moscow, Russia. The brush stroke decoration is also really simple to make, yet the color combinations and the variety of sizes and placements of these chocolate decorations make it so stunning.
To make a chocolate brush stroke, you will need tempered chocolate. Divide the melted tempered chocolate into bowls, depending on how many color variations you want to make. Then, add a few drops of oil-based coloring of your preferred color (alternatively you can also use powdered coloring), and mix them together until you get the color you want.
Drop a teaspoon of the melted chocolate onto a sheet of baking paper, then drag it in one direction using the teaspoon to create a brushstroke effect. Repeat this process until you have made enough decorations. Let it set.
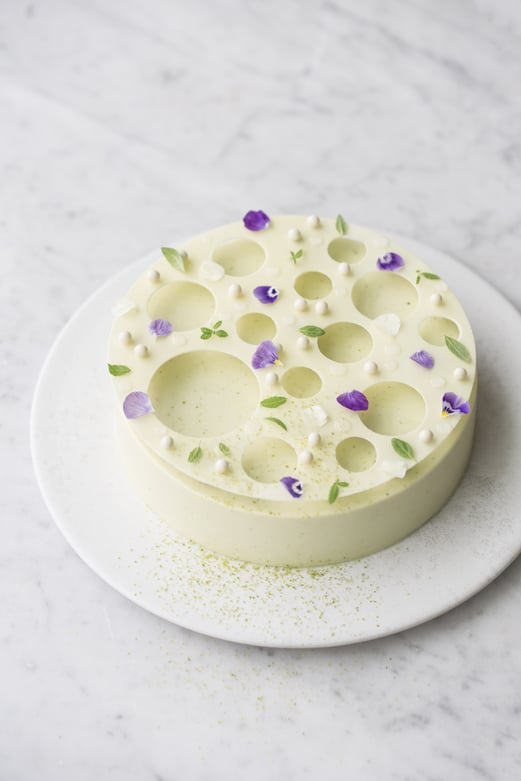
Adding a chocolate lid decoration to your cake creates an additional dimension. This beautiful example from Maja Vase makes use of the monochromatic color of their cake with the white chocolate. They then created a pattern with pansies, white chocolate pearls, “raindrops” and lemon verbena to add touches of color.
Chocolate lids are relatively simple to make. You only need tempered white chocolate, 2 sheets of plastic sheet, a large cake ring and some round cookie cutters.
First, melt and temper your chocolate. Then, spread it thinly between two sheets of plastic and let it set in the fridge. When the chocolate is fully hardened, cut it out into a large circle using the cake ring. To make a chocolate lid as shown above, use small cookie cutters in different sizes.
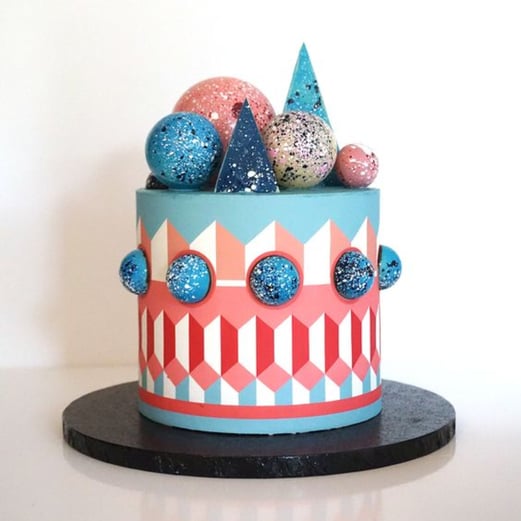
A.R.D Bakery, Glasgow
This bold and modern cake from A.R.D Bakery is sure to be a showstopper! And the best thing is, it’s really easy to make those sphere chocolate decorations. All you need is tempered chocolate, polycarbonate mould, and some chocolate food coloring of your choice.
If you want to have colored chocolate spheres as shown above, mix some coloring into your tempered chocolate. Also, you would want to add splashes of the food coloring to the mould you’re using and let it set.
To make the chocolate spheres, pour your tempered chocolate into the mould, then scrape off the excess chocolate with a scraper. Tap the side of the mould to remove any air bubbles. Then, flip the mould upside down to remove the chocolate. This creates a thin layer of chocolate that is left on the mould. Scrape off the mould to remove any excess chocolate.
Let it partially set at room temperature with the mould upside down on a parchment paper, then put it in the fridge for 10 minutes or until the chocolate fully hardens. Remove the chocolate from the mould.
To make the full sphere, slightly melt the edges of the chocolate sphere, then press two spheres together. Wipe away any excess chocolate, then let it set.
Read more: 5 Ideas for Chocolate Cake Fillings and Toppings
Some people choose to use candy melts or compound chocolate to make decorations. While they are easier to use and are less temperature-sensitive, they don’t give the shine that couverture chocolate does. They also tend to taste waxy and harden really quickly.
Our chefs recommend using couverture chocolate. It is a type of chocolate suitable for coating, moulding, enrobing and decorating. When tempered, couverture chocolate has a shiny appearance, has a firm structure that breaks nicely when bitten into, and is more stable against temperature changes.
Embassy Chocolate is a couverture chocolate brand proudly made in Asia. We offer our Zen White Chocolate 33%, a white chocolate coin product that has a balanced blend of vanilla and milk flavor that has a creamy and buttery mouthfeel, accompanied by a not-too-sweet aftertaste. For more information about this product, visit this page.
This Easter, we are redefining the seasonal palate by pairing the velvety, well-balanced sweetness of Embassy Zen 33% White Chocolate with a trio of...

Colour is not just an accent, it's a powerful medium that can transform a simple dessert into a captivating work of art.
Chocolate, a beloved treat enjoyed by millions worldwide, is facing a bitter truth: the steady rise in cocoa bean prices due to disease outbreaks and...